Thursday, 30 June 2011
Bachelorette weekend + pink peonies
I'm back! I spent an amazing bachelorette weekend in Ogunquit, Maine at the oh-so-lovely Achorage By the Sea resort (followed by a few days of visiting friends and family in New England). It was an awesome, awesome vacation (yes those are penis-shaped glow-in-the-dark straws) and I feel incredibly lucky to have such wonderful friends :)
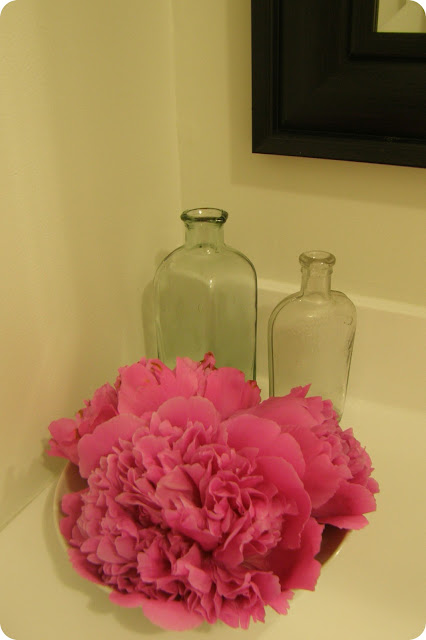
Of course it's always nice to come home, especially to bright pink peonies blooming in the garden.
Beautiful, eh? They're a perfect match for the cocktail napkins I purchased for our wedding (our colours are white and pale green, but I'm using a few bright pink accents). Too bad my peonies won't be blooming in August - how pretty would they have been at the wedding?
Instead, I clipped a few blooms and arranged them in a simple white bowl in our bathroom. They look - and smell - amazing!
Friday, 24 June 2011
Out of Office
I'm off to Boston for a few days to hang out with some girlfriends from college and celebrate my upcoming wedding. That means the blog will be quiet for the next few days, but I've got lots of fun projects to share when I get back. See you next week!
Monday, 20 June 2011
Hanging pot rack how-to
We've got a small kitchen with limited storage space, so when Adam's parents gave us this Ikea pot rack we were pysched (mostly because we've been storing our pots and pans in a cardboard box on the floor until now). Adam spent last week with his band at NXNE in Toronto, so I decided to surprise him by FINALLY hanging this baby (while our pots and pans sat in a box on the floor, it sat in the closet).
Using my new stud finder (which I scored for $5.99 courtesy of a Father's Day sale), I located two ceiling joists. Next, I calculated half the width of the pot rack and measured out from the wall along each joist, plus a couple of inches to allow for space between the pot rack and the wall. I marked each spot with pencil, then pre-drilled small holes for the ceiling hooks.
Then it was a matter of screwing the hooks into the ceiling - which was a challenge, what with my lack of brawn (I was all too happy to take a break halfway through to snap the progress shot below).
With my ceiling hooks securely in place, I shortened the chains that came with the pot rack by removing most of the links (another feat of strength) and hung my pot rack. Here it is in this morning's sunshine. Yay for no more cardboard box storage!
Friday, 17 June 2011
How to dress up an ugly floor lamp
Remember the lampshade I painted a couple of weeks ago? I used it to turn this $20 lamp from Zellers...
into a cute and simple reading lamp for our guestroom:
What you can't see in the photo above is that my lamp is quite a bit shorter than it was in the store, and it's missing a plug:
Yes, I did that. On purpose, too.
The thing is, I knew I wanted a very simple, black floor lamp to go with my painted lampshade - in other words, pretty much exactly what I ended up with. At first I thought I'd find an old floor lamp at a yard sale or thrift store that I could spraypaint, which turned out to be easier said than done. Everything I found was either the wrong shape, the wrong style, or just too darn expensive considering it needed a DIY overhaul. And then I spied the $20 Zellers lamp - right colour, right shape, right price, wrong height.
The lamp's stand is made up of four hollow metal pieces that screw together, and the lamp's cord runs through them. So the only way to shorten the lamp was to remove one of these pieces, which meant I had to cut the cord. Then it was a matter of pulling the cord up through the base, removing one piece of the stand, and threading the whole thing back together again.
Repairing the cord required a few minutes, wire strippers and electrical tape (you can find step-by-step instructions here). Easy peasy (and to think Adam made me promise not to burn the house down). My painted lampshade sits on the lamp's original shade, so I'm planning to cover the top with fabric to block the internal ugliness for my tall guests (or at least what I imagine is internal ugliness - short little me can't really see it). Luckily Young House Love has great instructions on how to do it.
And now, just because it's been raining for months here, here's a photo of some sunshiney goodness streaming into our guest room this morning. Happy Friday!
Wednesday, 15 June 2011
Fabric headboard DIY
Over at Nesting Place today, the talk is all about yard sale finds. Since we've had non-stop rain for about two months now, I haven't been to a yard sale in awhile - but I still managed to find an amazing deal last week:
After all, "free" is the most amazing deal of all. So yes, I did scrounge around in this wood pile for a few decent boards that I could transform into...a headboard for our guestroom!
As you can see in the photos, I repeated the fabric from my DIY seat cushion, which has a woven texture to it (it looks like a big swath of grey in photos, but the texture makes it more interesting in person). The chair - which you can see in more detail at the end of this post - is one of my favourite yard sale finds of all time (hence my Nesting Place link up). I found it a couple of years ago, spray-painted it black, and then it sat in the basement of our old apartment. So I'm thrilled to finally have space for it, and I love how this yard sale find works with my free find - the headboard.
Speaking of the headboard, it looks a little high right now - I'm planning to add some extra "cushion" to our futon mattress (our guest bed, until we spring for a proper one), which will bring the height of the bed up several inches.
So how did this project come together? Adam cut my free lumber to size for me, and I turned that into a frame using some simple metal brackets and screws.
When the frame felt good and sturdy, I placed it on a large piece of quilt batting and secured it with staples, making sure the batting was taut and wrinkle-free (you can find a more detailed tutorial here). I cut away the excess batting, then repeated the entire process with my fabric.
I put a couple screws and anchors in the wall to hang it and voila: headboard done!
At least I think it's done (I'm thinking about using these nickel finish upholstery tacks I have lying around to frame out the headboard)...
Tuesday, 14 June 2011
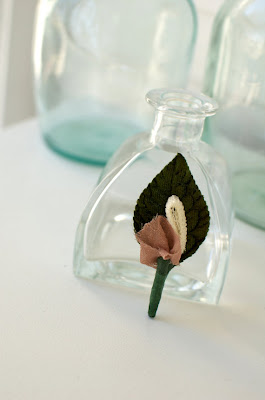
Fabric boutonnieres
Please excuse this little wedding post - we've got less than two months to go, so all the DIY details are on my mind. Adam recently decided to buy a suit (actually two) instead of renting a tuxedo. He's going with a black suit/white shirt/black tie, similar to this Ralph Lauren model's look (the 'Blue Steel' pose is optional).
His two groomsmen - and brothers - will be wearing something similar, but obviously their suits won't be exactly the same. When we thought they'd all be in matching tuxes, we decided to skip the boutonnieres (I'm not a big boutonniere fan to begin with). But now I'm thinking that a cute - and unique - boutonniere could help link their looks together, and add some more fun to the day too. I love the idea of fabric boutonnieres and here are a few of my favourites, found on Etsy of course.
This green, white and yellow version from Katie-byrd's shop is all kinds of cute, and a little rustic too:
I also love these fabric and button boutonniere's by Luvlee Bits...
and this somewhat simpler version too.
Here are another couple of simple but still very cute ones from a Canadian seller
JujaCrafts has all kinds of amazing finds, but I especially love this guy:
And how pretty would a boutonniere made with these bright green hydrangea blossoms be?
I basically love everything in a simple start's shop, including:
Finally, here's a more masculine version on Monicaj's shop, handmade from vintage ties:
So many great options, so little time...and I guess I need to ask Adam what he thinks, too :)
 |
| Source |
This green, white and yellow version from Katie-byrd's shop is all kinds of cute, and a little rustic too:
 |
| Source |
 |
| Source |
 |
| Source |
 |
| Source |
 |
| Source |
 |
| Source |
 |
| Source |
 |
| Source |
 |
| Source |
 |
| Source |
 |
| Source |
Friday, 10 June 2011
Spray painting old hardware
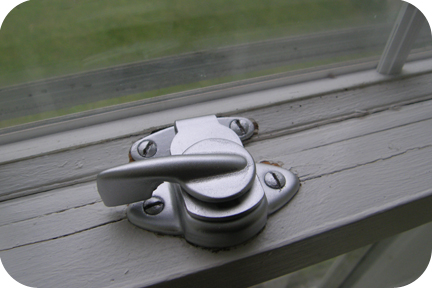
Old houses like ours usually come with old windows. And old windows usually come with cracked paint, drafts and old hardware. While we're saving to replace our windows with energy-efficient ones, we spruced up the old guys with a fresh coat of white paint. The paint made a huge difference, but it also made the dingy old hardware stand out. I tried cleaning it, but that didn't work very well, so I decided to try spray-paint instead. Here's what the hardware looked like before (unfortunately I seem to have photographed one of the better ones - most were really discoloured or paint-covered):
I removed all the locks and placed them on some newspaper outside. Then I sprayed them (including the screws) with several thin coats of Krylon metallic spray paint in silver. It was a really easy project - the hardest part was remembering to put the lock in different positions, since different parts of the lock show when it's open versus closed.
I'm really happy with how the project turned out - it's a great temporary fix until we can afford new windows - and I'm already planning to update other hardware this way...like maybe doorknobs?
Thursday, 9 June 2011
Old chair, new home
When we moved into our house a few months ago, I was determined to find room for this chair, which I found at a yardsale a couple of years ago and spraypainted black (there was no space for it in our apartment, so it sat in storage for months). So I did a little happy dance when I realized this guy would fit perfectly in the corner of our newly-painted guest room.
Unfortunately my homemade seat cushion was damaged in the move (rain and moving don't mix), so I sewed a new one (and a back cushion to boot).
I love how the black and white fabrics work with all the green in the room (just wait until you see the bedspread), but mostly I just love having a place for this chair. And the price was right, too - I spent about $3.75 on fabric for the back cushion, and the fabric for the seat cushion was on sale for $2.00/m (I already had the stuffing, so that part was free). I've read a few blog posts on the benefits of taking decorating risks lately, like buying and refinishing this chair, even though I didn't have use or space for it at the time. But don't take my word for it, here's Henro giving it his stamp of approval last night (before I finished sewing and de-lumpifying the cushions).
I joined the textile link party at freckled laundry:
Subscribe to:
Comments (Atom)


